♥ How to: Marble Flatlay! // Marble Desk DIY

This is basically a 2-in-one Post this time :)
The first thing is a DIY to transform your dull desk into a pretty marble-piece, and the second part is showing you how to make a pretty flatly on a marble surface (doesn't have to be a desk ;) but you will see that later in the post)
For the marble-desk DIY you need:
- A desk (mine is the LIATORP from IKEA)
- Decoration Sticky-foil (Marble)
The whole DIY now basically is: sticking the foil to the desk. It sounds easy but it took my boyfriend and my ages since we wanted it to be as neat as possible without any air bubbles. Get you a person to help you, because of its MUCH easier when one person holds the foil (to prevent it from sticking everywhere) and the other person sticks it down carefully centimetre by centimetre.
You could also watch a video on youtube for help and tricks how to do it properly, I did that afterwards and leaned, that applying heat while sticking it on will make it easier and will remove the air bubbles.
My result:


I didn't have enough foil to cover my whole desk so I decided to only put foil on the sides of my desk (about a third of the desk on the left and on the right). I really like it and it is the perfect backdrop for nice Instagram photos!
Which brings me to my next point:

I will try to make this small tutorial as clear as possible, but even for me, it's still trial and error since I am no professional photographer and I only do this for fun and as a hobby.
 |
| Photo of how ridiculous the Setup looks |
I didn't use a Desk but a big black stone plate (I don't know what kind of stone it is, maybe a black marble or black granite) which I bought at the hardware store. Be careful with your plate if you buy one, they are really heavy!
For the photo, I showed you above I place the stone plate on a stool next to my window. I used daylight in both of the photos because I think natural sunlight is the prettiest light to take photos.
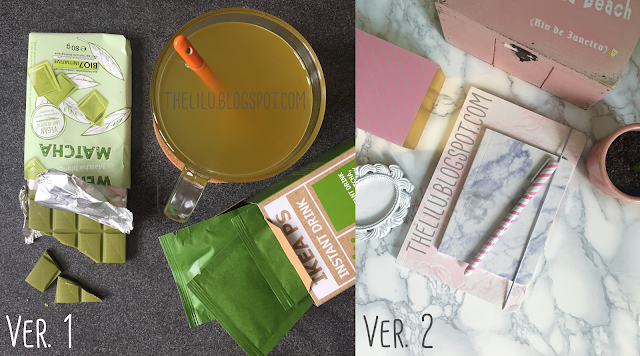
I then placed the objects my wanted to take a photo of on the plate, I moved them about 10 times until I was satisfied with the setup :D My theme for the photo is quite clear I think, I wanted to have it green, because I was inspired by the green IKEA bacteria drink to take photos and I still had the green matcha chocolate at home. This photo is actually unedited, Version 2 is edited though.
 |
| my aloe vera babies |
For Version 2:
My desk is right next to the window so I looked for the brightest spot closest to my window to take the photo. Lighting is nearly everything when taking photos if you want to take a photo of beautiful food at a restaurant but its already night and the restaurant is pretty dark: maybe it's not the right time to take that photo because it will probably not turn out great. I actually only wanted to take photos of my new marble notepads to prove my love for marble stuff, but I found that the pastel pink things on my desk would give the photo a nice color accent and suddenly the pen also matched the photo and I found the small photo frame on my desk and so on. You basically only need one piece to inspire you and it will grow from there :) This photo is edited, I lightened the marble up a bit more so it's nice and white and I turned the contrast up in some corners and sharpened it to have nice details.
Here are some more photos I took that day on my desk:
 |
| art pieces I bought at a convention |
 |
| vegan steak & avocado on toast |
Some tips for good lighting:
The best lighting, like mentioned before, is daylight. It is just very soft and beautiful. But if you don't have a lot of time during the day (especially now during winter time) or you don't have a bright room or whatever keeps you away from sunlight, don't worry.
To simulate soft daylight you can just buy some Umbrella Studio LightsThanks so much for reading, I hope this was helpful for some of you!
Have a lovely day :)
Lily ♡


Kommentare
Kommentar veröffentlichen